
Get to know how different grit types and grade impact the sanding process so that you always choose the right supplies for the project at hand...
If you’ve ever worked with wood, you’re likely familiar with instructions to sand all edges after cutting: before applying a finish, between coats of paint, and so on. Seeing sandpaper on a tools and materials list may seem easy enough to check off—until you hit the hardware store and face stacks of sheets and booklets, each distinctly identified with a different set of numbers, or sandpaper grits. Which did this project call for again?
Different sandpaper grits perform very different jobs, and selecting the right grit can be confusing when you’re starting out. Warm up with these basic recommendations and rules of thumb. This guide will run you through:
A. Selecting the right size of sandpaper grit,
B. Choosing the appropriate coarseness for the project,
C. Considering the best type of grit to choose, and
D. Finding the right tool for the easiest effort.
After you have a few completed projects under your belt, you’ll be an old pro at picking just the right sandpaper.
Sizing Sandpaper Grit
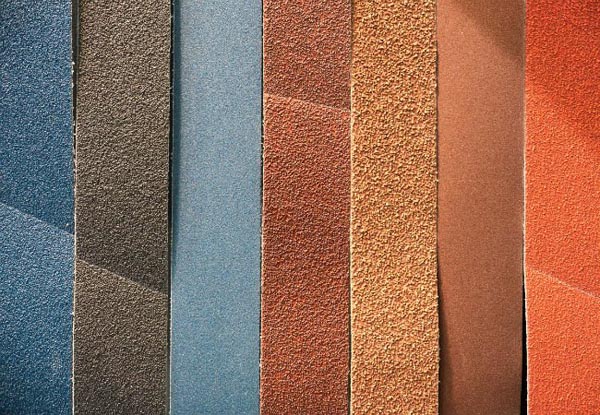
Sandpaper isn’t made of sand, of course, but rather it consists of fine particles from either natural or synthetic sources. The particles (also known as grains or grit) are sifted through screens and sorted by size before being bonded with adhesive to a paper, sponge, or cloth-type backing to create an abrasive material that’s handy in a number of do-it-yourself situations.
Distinguishing sandpaper grit sizes is important because not every project requires the same.
In the United States, grit is determined based on a gradation scale established by the Coated Abrasive Manufacturers Institute (CAMI). When shopping for sandpaper, you’ll see numbers such as 80-grit, 100-grit, or 200-grit. Keep in mind:
• The higher the number, the smaller the grains and the finer the sandpaper grit.
• And, conversely, lower numbers indicate larger grains and overall coarser sandpaper.
On the CAMI scale, sandpaper grit is measured in microns, and to get an idea of how small a micron is, check out a piece of 100-grit sandpaper. The small grains on the sandpaper measure approximately 141 microns in size, which is equivalent to .00550 of an inch. Very small.
Most sandpaper you buy at DIY centers and lumberyards will bear the CAMI scale, but if you order sandpaper online, you may run across sandpaper grit sized by the Federation of European Producers of Abrasives (FEPA). Grit sized with the FEPA scale is indicated by the letter “P” preceding the grit number. While there are too many grit gradations to list, if you’re buying FEPA-sized sandpaper, the following commonly used CAMI sizes will give you an idea of the corresponding FEPA sizes. FEPA sizes are not an identical match to CAMI sizes, but you can get something very close by selecting one of the two closest FEPA numbers.
• 40-grit (CAMI) sandpaper corresponds closely to (FEPA) P-36 or P-40
• 80-grit (CAMI) sandpaper corresponds closely to (FEPA) P-80 or F-100
• 100-grit (CAMI) sandpaper corresponds closely to (FEPA) P-100 or P-120
• 120-grit (CAMI) sandpaper corresponds closely to (FEPA) P-120 or P-150
• 220-grit (CAMI) sandpaper corresponds closely to (FEPA) P-180 or P-220
• 400-grit (CAMI) sandpaper corresponds closely to (FEPA) P-600 or P-800
Selecting the Correct Coarseness
To make choosing sandpaper easier, manufacturers identify a coarseness level in words on the package in addition to the specific grade. This is essentially a range of grit sizes that are similarly effective for the same sanding work. In fact, it’s not uncommon for projects to call for a certain coarseness level as opposed to a specific grit of sandpaper, so it’s smart to know what each level includes.
• Extra coarse sandpaper in the 24- to 36-grit range is tough stuff. It’s used for removing paint and varnish that you think might never come off. The sanding of old floors may also require the abrasiveness of extra coarse sandpaper. Don’t even think about using this stuff on any but the toughest jobs.
• Coarse sandpaper‘s strong suit is the rough shaping of wood and the removal of previous finishes, such as light coats of polyurethane. Coarse grits are typically in the 40- to 50-grit range.
• Medium sandpaper, ranging from 60- to 100-grit, accommodates some final shaping. Primary sanding of rough wood and the removal of planning marks on wood is often best done with medium-grit sandpaper.
• Fine sandpapers range from 120- to 220-grit. For most home workshops, this sandpaper will suffice for final sanding before the work is finished.
• Extra fine sandpaper is often used between coats of paint or varnish. Grits of 240, 320 and 400 are termed very fine, while extra- or superfine sheets with grits of up to 600 are best-suited for polishing jobs.
Note: On many projects, you’ll start with a coarse sandpaper grit, and then switch to finer grits to obtain a smooth finish.
Choosing Grit Material
Not only does the density of sandpaper grit make a difference in the success of your sanding project, but the type of abrasive material does, too. Some types of grit grain are better suited to smooth and sand types of materials (wood versus metal, for example). Most manufacturers list the type of material best suited for sanding on their product labels, but it’s smart to know what type of grit to look for before you shop.
• Flint: A natural grain, flint is durable and well suited for sanding off surface products, such as old varnish or paint.
• Emery: A natural grain, emery sandpaper is most often used for removing corrosion and/or polishing steel and other metals. The edges of its particles can be too sharp for sanding wood.
• Garnet: Another natural grain, garnet is slightly softer than flint or emery, so it tends to dull relatively quickly when used to sand metal. It’s best-suited for fine sanding of wood.
• Zirconia alumina: A synthetic product, this grit is long-lasting and well-suited for grinding away burrs on metal and for an initial sanding of rough wood. When sanding metal with zirconia alumina, the grit particles can actually become sharper, so you won’t have to change sandpaper frequently.
• Aluminum oxide: Another very durable synthetic grit, aluminum oxide is well suited for sanding and polishing various types of metal, including bronze and alloy steel, in addition to being a good choice for sanding all types of hardwoods.
• Silicon carbide: The most durable of all synthetic abrasives. Silicon carbide is good for sanding a wide range of materials, including plastic, metal, hardwoods, and softwoods.
Working with the Right Tools
Sandpaper is very versatile by itself: You can fold a sheet into a palm-sized square, sand until the grit dulls, and then refold it for a fresh sanding surface. If you have a lot to sand, however, you may be better off making use of one or more popular sanding tools. Even with these instruments, choosing the right sandpaper grit and type for the job still applies.
• Manual hand sander: This inexpensive tool features a pad, often made from rubber; side clamps to secure the sandpaper; and a handle that allows the user to move the sander quickly and easily. Manual hand sanders are great when you need to sand large areas, such as the side of a bookcase that would take much longer if you were sanding with a piece of folded sandpaper.
• Sanding sponge: Made from a flexible sponge that’s covered with sanding grit, the suppleness of a sanding sponge allows the user to sand rounded edges uniformly just by pressing the sponge on the edge while sanding. Some sanding sponges come with a beveled side that helps with sanding in tight spots, such as around the base of stair balusters.
• Vibrating palm sander: This corded power sander is small enough to hold in one hand and you can choose from a variety of sanding plate shapes, including square and rectangular for sanding open areas, or triangular for sanding in hard-to-reach spots. Just attach sandpaper (some types of palm sanders accept only pre-cut sanding pads) and flip the switch on—the powerful vibrations do all the sanding work, you only need to guide the sander.
Choosing the Right Sandpaper Grit, Type, and Tool
• Orbital sander: True to its name, this power sander moves in a circular, orbital pattern, which should not be construed as spinning. Imagine placing your palm flat on a table and moving it in a series of small circles—that’s the same motion an orbital sander makes. Orbital sanders, depending on the size and brand, accept either cut pieces of regular sandpaper, or pre-cut sanding pads, and they are well-suited for sanding flat areas.
• Random orbital sander: Like a regular orbital sander, a random orbital sander moves in circular patterns, but at the same time, the entire sanding base also moves in an arbitrary side-to-side and back-and-forth pattern. This helps prevent sanding marks that can occur if the sander is held in one place too long. Random orbital sanders have circular sanding plates and usually accept only pre-cut sanding disks.
• Belt sander: The power belt sander packs a lot of sanding power into a handheld sander that usually requires both hands to operate. Pre-packaged sanding belts (loops) are fitted over two cylindrical drums at the base of the sander. When powered-on the drums spin and the sanding belt moves in a continuous direction. Belt sanders are great for removing old varnish or sanding large rough surfaces, but because the belt moves only in one direction, the user must keep the sander moving at all times. If a belt sander is held in one place, it can quickly create deep sanding marks in the wood.
• Drum sander: The drum sander features a large cylinder that accommodates a wide sanding belt or loop. When the machine is powered-on, the drum spins, sanding in much the same way as a belt sander. Like a belt sander, the drum sander is also fairly aggressive and care should be taken to keep it in motion to prevent sanding marks.
• Bench-mounted sanders: Sanders that mount permanently to your workbench are mainly used for small woodworking projects. Bench-mounted sanders incorporate one of the above sanding methods; they will vibrate, spin or sand by means of a belt or drum. Instead of moving the sander, the user moves the wood that’s being sanded when operating bench-mounted sander.
• Floor sanders: Floor sanders feature large belts, drums, or orbital sanding plates that can efficiently remove old varnish on hardwood flooring or grind down warped wood flooring. These powerful machines make quick work of sanding, but they must be operated with care to keep from damaging the wood floor.
Abrasives Suppliers Directory -
Abrasives Buyers Directory -
Abrasives Manufacturers -
Abrasives Online Marketing
Sitemap -
User Agreement -
Terms of Use -
Privacy Policy


